Rome Wasn't Built in a Day
Roman Architecture Explored, Digitally Rendered and Skillfully Assembled
Outcomes / Skills:
-Students should be able to create and use schematic drawings (architectural)
-Students must demonstrate knowledge of measurement and layout skills (simple angles, lengths, etc.)
-Students must demonstrate research skills
-Students should be comfortable using hand tools (identification, implementation,safety)
-Students must demonstrate knowledge of measurement and layout skills (simple angles, lengths, etc.)
-Students must demonstrate research skills
-Students should be comfortable using hand tools (identification, implementation,safety)
Software / Materials Needed:
Internet Explorer, Google Sketchup or AutoCAD, Wood and simple building supplies such as hot glue, Hand tools for cutting and manipulating building materials, pencil and paper
Project overview:
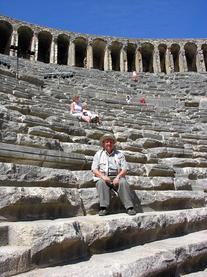
Step 1: Explore Roman Architecture beginning with the video below and continuing on to discover Aqueducts, Arch of Titus, The Roman Forum, The Collosseum etc...
Step 2: Using and Pen and Paper draw their NEW or replica structure based on Roman style architecture from 3 different views (Front, Top down, Side)
Step 3: Build a digital rendering of their Roman creation to the best of their ability using Google Sketchup or AutoCAD (for more advanced students)
Step 4: Using hand tools and provided materials design the structure out of wood and other materials such as rope and cement( hot glue) that the Romans used.
Step 5: Take a picture of your creation from several angles to capture the memory forever
Step 1: The Digital Exploration
NOTE: This Project Does Require Hands-On Construction Best Done in a Woodshop atomsphere.
***Use the video below to begin your research of Roman Architecture and then use Google Sketchup or other software to digitally design your Romanesque creation before assembling it from wood and other materials yourself.
Step 2: The Hand Drawing From 3 Views (Front, Top Down, Side) Drawing are 2 Dimensional only from the three views
Do you struggles with drawing? Take the mental picture in your mind of what your structure will look like and watch this video. The video shows you that drawing an object in 2 dimensions from different angles is not really that difficult. Enjoy.
Step 3: Create Your Digital 3D Design
Remember, Roman's used a combination of roofed areas with wide open areas. Watch the student demo video below to get inspired and create your realistic looking Roman style creation. Remember to save as you work. You may also benefit from watching the many google sketchup tutorials on the tutorial pages of this site. Here is the student Demo Video.
SAFETY BREAK: Watch the following videoS about hand tool safety and power tool safety before continuing.
Your teacher may have a quiz for you to complete before continuing.
Step 4: It's Time to Make Your Roman Design Real
Gather the materials, drawings, and tools you need and begin to assemble your Roman design from the ground up. This process might begin slow but as you go and if you stick to your plan you will see your creation begin to look more and more like your 3D Sketchup Design.